
…with Java in Eclipse
This Tutorial will guide you through the first steps of how to code your own automated tests in Selenium using Java in Eclipse. This tutorial will also work with any other Java-Development-Environment besides Eclipse, but all screenshots and basic instructions will be for Eclipse.
Tutorial Sections:
- Prerequisites
- Download Selenium
- Create your first Selenium project
- First Selenium Test With Firefox
- Explanation of the code sample
- Cross-Browser Testing: Firefox, Chrome and Internet Explorer
Prerequisites
- To get going you need to have Eclipse installed on your computer
- You should be able to run a basic Hello-World-Example in Eclipse or in the java development environment of your choice.
- The browser in which you want to test your web application with selenium should be installed on your computer. To complete this tutorial you should have at least installed Firefox and optionally Chrome and Internet Explorer.
Download Selenium
The first thing you need to to is to download the Selenium library. This library will provide you with all the classes and their functions of the Selenium WebDriver framework which are the core when coding your own web automation scripts for testing.
Download the Selenium library files here. To do that open the link, scroll down to “Selenium Client & WebDriver Language Bindings”, click on the download link of the line for “Java” and extract the downloaded zip-archive to a new seperate folder of your choice. Remember this folder because in the next section we will connect your new java project to these library files.
Create your first Selenium project
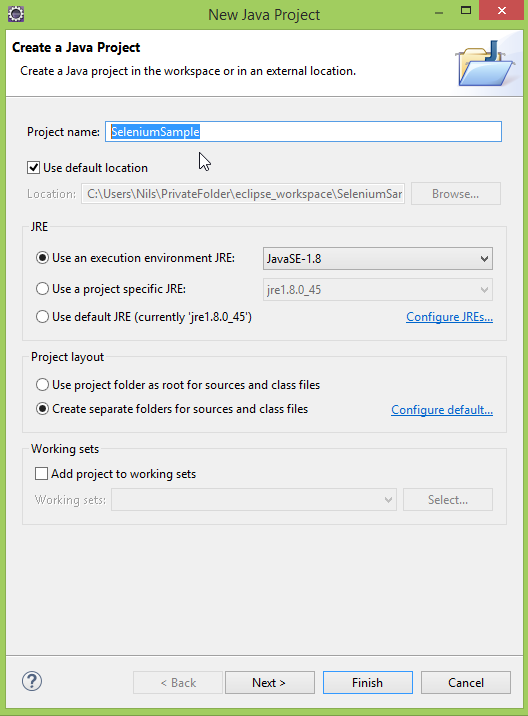
- Create a new Java Project in Eclipse. Give the project a neet name like “SeleniumSample” and click “Finish”.

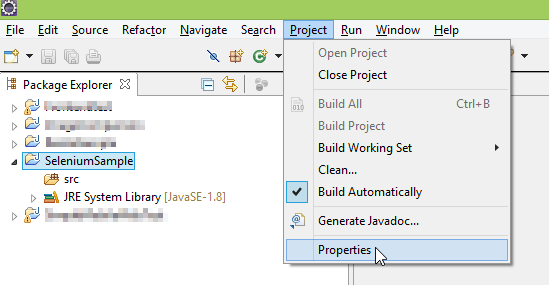
- The new java project should now be visible in the project list on your left side (the “Package Explorer”). Click on the project folder you just created and then go to “Project” > “Properties”.
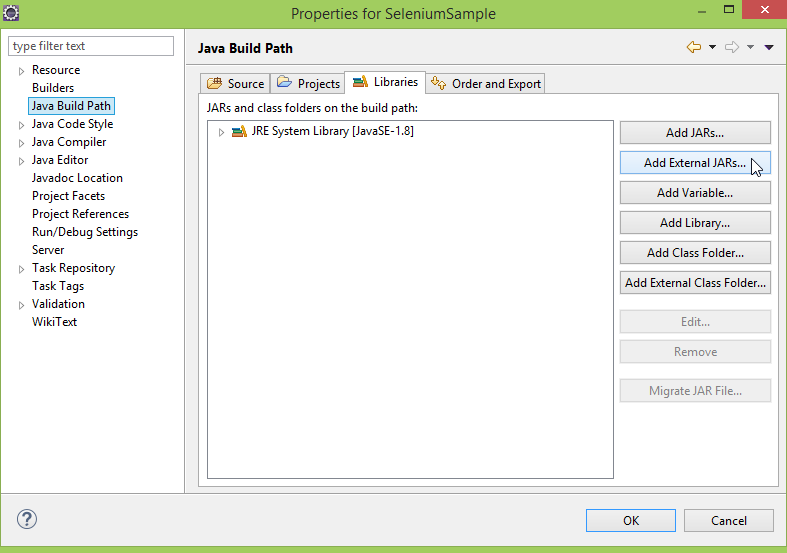
- Go to “Java Build Path” and choose the register “Libraries”. Then click the button “Add External JARs…”.
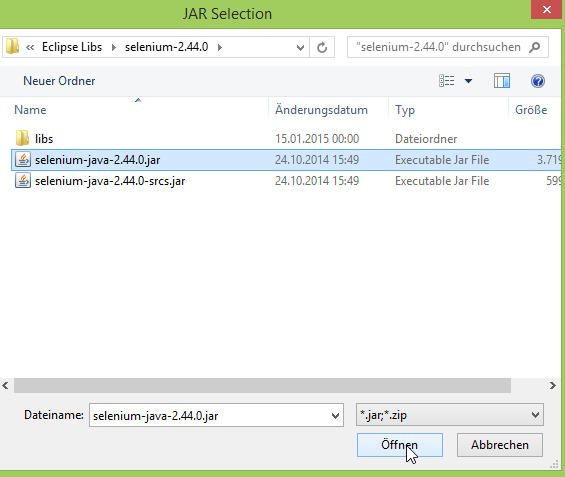
- Browse to the folder where you extracted the selenium library files. In the main folder select the file “selenium-java-x.xx.x.jar” (exact name depending on the version of the selenium library you downloaded.). Click “Open”.
- Again, click the button “Add External JARs…”, go to the “lib” folder of the downloaded folder, press Ctrl+A to select all jar-files and then click “Open” again.
- In the “Properties” dialog click “OK”. Your project ist ready to run Selenium scripts!
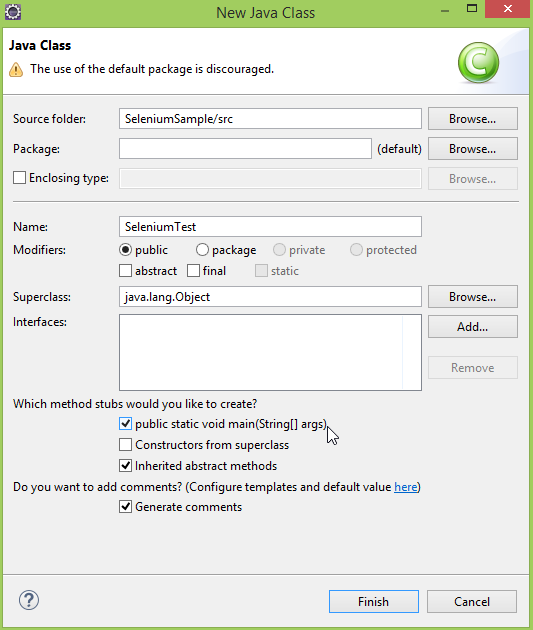
First Selenium Test With Firefox
- Create a new Java Class within your SeleniumSample-Project and name it “Selenium Test”.

- Open the new class to edit it.
- Overwrite every code in the class with the following code.
- Save the class (e.g. press Ctrl+S).
- Execute the class, see what happens and view the test results in the eclipse console.
import org.openqa.selenium.By;
import org.openqa.selenium.WebDriver;
import org.openqa.selenium.firefox.FirefoxDriver;

/**
 * @author Nils Schuette via frontendtest.org
 */
public class SeleniumTest {

	/**
	 * @param args
	 * @throws InterruptedException
	 */
	public static void main(String
[] args) throws InterruptedException { // Initialize the WebDriver to control the Firefox Browser WebDriver webDriver = new FirefoxDriver(); // Maximize the browser window webDriver.manage().window().maximize(); // Open google.com webDriver.navigate().to("http://www.google.com"); // locating the search-field and typing: "Selenium" webDriver.findElement(By.id("lst-ib")).sendKeys("Selenium"); // giving google time to load the search results Thread.sleep(3000); // click on the test-result with the given link-text webDriver.findElement( By.partialLinkText("Selenium - Web Browser Automation")) .click(); // test if Headline is "What is Selenium?" String textFound = webDriver.findElement(By.cssSelector("h2")) .getText(); if (textFound.contains("What is Selenium?")) { System.out.println("Test passes!"); } else { System.out.println("Test fails!"); } // Waiting a little bit before closing Thread.sleep(7000); // Closing the browser and webdriver webDriver.close(); webDriver.quit(); } }Explanation of the sample code
With the help of the comments most of the code should explain itself. I just want to go over some general principles of how to use Selenium.
WebDriver webDriver = new FirefoxDriver();
You will always need a line like this to initialize a WebDriver-Object. Think of the WebDriver-Objekt as a open browser to which you can send commands.
webDriver.manage().window().maximize();
After you initialized/started your browser for testing you can send it various commands as we do here with the command “manage().(…)”. Go through the suggestions that you get from Eclipse after typing “webDriver.” or have a look at the method summary of the WebDriver-Class to see what else you can do with the WebDriver-object.
webDriver.findElement(By.id("lst-ib")).sendKeys("Selenium");Very often you will use the command “findElement” with WebDriver. This command enables you to locate certain elements on a webpage. As soon as you have identified them with this command you will be able to do different actions with them like clicking on them, checking their position or testing what text they contain. Have a look at the method summary of the WebElement-Class to see what else you can do with the WebElement-object.
Cross-Browser Testing: Testing with Chrome and Internet Explorer
While the driver to automate Firefox already comes with the main Selenium library you need to download drivers for other browsers separately. Here is what you need to do if you want to run your test also on Chrome and Internet Explorer:
- Download the ChromeDriver executable. After opening that link, follow the link to the latest release and download the zip-file that fits your operating system. Extract the zip-archive to a folder of your choice but remember the location.
- Download the latest InternetExplorerDriver executable. After opening that link, click on the folder with the highest version number and download either IEDriverServer_Win32_x.xx.x.zip or IEDriverServer_x64_x.xx.x.zip depending on your system. Extract the zip-archive to a folder of your choice but remember the location.
After you’ve done that you need to tell your environment where these two drivers are located. To do that you need to edit the following code to match the locations where you saved the just downloaded drivers and then add those line at beginning of your main-method:
		System.setProperty(
				"webdriver.chrome.driver",
				"C:/your/custom/path/chromedriver.exe");
		System.setProperty(
				"webdriver.ie.driver",
				"C:/your/custom/path/IEDriverServer.exe");
That’s all. Now you can use them in the same way as we used the FirefoxDriver. Usually in automated website testing we want to make sure that everything works in all browsers the same. Therefore I just made a few little changes to our sample code in order to run it with all three browsers:
import java.util.ArrayList; import org.openqa.selenium.By; import org.openqa.selenium.WebDriver; import org.openqa.selenium.chrome.ChromeDriver; import org.openqa.selenium.firefox.FirefoxDriver; import org.openqa.selenium.ie.InternetExplorerDriver; /** * @author Nils Schuette via frontendtest.org */ public class SeleniumTest { /** * @param args * @throws InterruptedException */ public static void main(String[] args) throws InterruptedException { // Telling the system where to find the chrome and internet explorer // driver System.setProperty( "webdriver.chrome.driver", "C:/Users/Nils/Programm Daten/Eclipse Libs/WebDriver/ChromeDriver/chromedriver.exe"); System.setProperty( "webdriver.ie.driver", "C:/Users/Nils/Programm Daten/Eclipse Libs/WebDriver/IEDriverServer_x64_2.44.0/IEDriverServer.exe"); //Initialize all three browsers and store them in an ArrayList. ArrayList webDrivers = new ArrayList(); webDrivers.add(new FirefoxDriver()); webDrivers.add(new ChromeDriver()); webDrivers.add(new InternetExplorerDriver()); //Run the same test case for all three browsers for (WebDriver webDriver : webDrivers) { // Maximize the browser window webDriver.manage().window().maximize(); // Open google.com webDriver.navigate().to("http://www.google.com"); // locating the search-field and typing: "Selenium" webDriver.findElement(By.id("lst-ib")).sendKeys("Selenium"); // giving google time to load the search results Thread.sleep(3000); // click on the test-result with the given link-text webDriver.findElement( By.partialLinkText("Selenium - Web Browser Automation")) .click(); // test if Headline is "What is Selenium?" String textFound = webDriver.findElement(By.cssSelector("h2")) .getText(); if (textFound.contains("What is Selenium?")) { System.out.println("Test passes!"); } else { System.out.println("Test fails!"); } // Waiting a little bit before closing Thread.sleep(7000); // Closing the browser and webdriver webDriver.close(); webDriver.quit(); } } } - The new java project should now be visible in the project list on your left side (the “Package Explorer”). Click on the project folder you just created and then go to “Project” > “Properties”.